Archive for the ‘Clothing’ Category

Comparing the Implants Part One: The Sports Car of the Booby World…Lolas

As a clothing maker and a dancer, and because of market demands, I’ve had the opportunity now to extensively test out all three of the major brands used by our community.

I’ll start off by saying that all of the Big Three (pun intended) have disadvantages and strengths. You want great value for the price? eBoobs, hands down. You want a “Ferrari”? Superior appearance but oh my the hassle? Lolas, the most beautiful boobs in SL, bar none. Want ease of use and excellent choices? Implant Nation.

That’s right. You can’t really go wrong with ANY of the the great makers out there today. But there is no “perfect” choice.

In this first part of my series of reviews, we’ll take a look at the most beautiful, and brutal, implants on the market today.

Lolas – The Sports Car of Implants

They are expensive at 1100$L. They are the least flexible when it comes to top changes. The stock clothing that comes with them is limited, albeit interesting. Up and downsizing is mediocre. The extras are minimal and skin coloring is mediocre. So what’s to like about Lolas? (Go here for the Lola’s Store)

They are beautiful, pure and simple. The best analogy I can think of when describing Lolas are that they remind me of high end sports cars. They look great and they attract a crowd. But like a sports car, they can be maddening to use and they need a lot of attention if you want the most out of them.

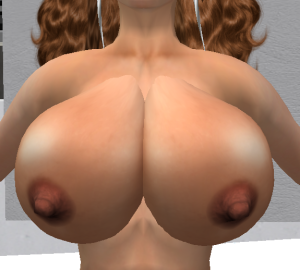
Let’s look at how they compare visually. Universals are on the left, eboobs the center, Lolas on the right.

Universals .50

The Pros

In my opinion, great implants in real life don’t like “implants” at all. Done by a truly skilled doctor they simply look like very large breasts, not rocks or balloons. You can absolutely create a very natural, big, look with both the eBoob naturals and with Implant Nation’s (INs)Universals. But you need to be very careful about positioning and the rotation of both these products. In fact, positioning with Lolas is perhaps one of their great strengths: unless you want very customized positioning (see below), usually need very little done beyond simple vertical positioning.

Now I do realize that some girls do like the obvious implant look. So do lots of guys. If that’s you, Lola’s are not going to make you happy.

Then too, if you love truly enormous hooters, you’re much better off with eBoobs or INs. Lola’s just don’t look that great if you want to supersize.

But if you want a look that very very closely mirrors what naturally large boobies like like in RL, these are the ones. They fit the body almost exactly like either very large natural or very well done implants do on a breathing human being. They ARE beautiful in shape and in sizes that would likely be EE or even FF in the real world. Bigger then that and they start to look dumb.

Enough gushing.

The Cons

Lolas are expensive, but that’s not what really bugs me about them.

I can make a very strong case for my opinion that NO other implants can handle a booby top as well as Lolas. Nice tops look fantastic on them. It’s when you take that top off that the trouble begins.

Lolas are, bar none, the worst implants when it comes to removing and replacing a top. Yes, if you stick to the stock tops that come with them, you can switch them off and on without problem and I know quite a few girls who do just this via the popdown menuing system. But how boring can you get? I want to wear the latest tops, not some default item. You certainly can wear “custom tops” with Lolas or I wouldn’t bother designing for them. But my oh my, they’re a pain in the ass when you need to put a custom top back on after you’ve removed it, say during a moment of passion.

I’m used to the ease of change with INs. Thru the HUD, you simply take off your top and put it back on. Doesn’t matter if it’s stock or store bought. You can’t do that with Lolas. If you remove the top and then try to put it back on via the menuing system, you’ll get one of the stock tops. The only way to put that hot top you just got at Whimsy’s Closet back onto your sexy body is to wear the applier that came with it…and it often takes a few tries to restore it.

Seriously, this stinks, and makes Lola’s virtually useless for the stage. I wear them anyway, but it’s such a PAIN to restore tops that I end up just using the stock clothing when I know I’m going to be making a lot of top changes. Argggggh!!!!

And Lola’s have another couple of annoying “features”.

For one, if you have happened to change the color of your Lola’s supplied clothing, that color will impact the color of a custom top you’ve just bought.  Here’s what I mean: the last time you wore the Lolas you colored a stock top black through the menus. Wearing the same set of boobs, you put on a new custom top you just bought. The black will “tint” the new top, making it look quite different than what you expected.

Solution: If you run into this, click on the boobs, go to clothing, go to color, and change it white. You can do this while wearing the custom top, or you can apply it after the color change. Essentially, you’re “clearing out” the black. Totally ridiculous.

The other thing is this…Lolas have a habit of “remembering” what you last wore on that copy of the breasts and, again if you try to put on a new top, you may think you got ripped off because the top will not appear. NO.  Here’s the fix: Wear the applier for the new top. Touch the boobies and go to clothing and pic something, like a T-Shirt. Then click the applier…it should then show the new one after a few seconds.

Those complaints (and they’re big ones for me) aside, kudos to the Lola’s developers for including  “regular” t-shirts, tank, and bra that match the t-shirt, tank and bra that are part of the boobs themselves. Nice touch. Strangely, they didn’t including a base bikini top to go with the EXCELLENT bikini top that is part of the implants.

Unlike INs, you get ONE shape with Lola’s. That’s not so bad since that shape is so gorgeous. But here’s ANOTHER odd quirk: you really can’t customize positioning the breasts individually.

Oh yes, you can position them as a pair (see above), which is far more common, using the usual left/right/up/down and rotate actions once you have them in edit mode. So why am I bitching about the ability (or lack thereof) of positioning each breast seperately? Why does this matter? Well, it matters a LOT if you’re a super stickler for skin matching because you may want to separate the cleavage more, or squeeze them more closely together. You can edit the boobs separately to do such things, but the moment you use the Lola’s menu and resize or put on a garment, the boobs will instantly go back to their default locations. A nice fail-safe mechanism for those who shouldn’t be doing such tweaking anyway, but a real annoyance to those of us who want flexibility.

Skin matching is nothing to shout home about. Lolas do come with stock skin matching, which is ok, and you can use a coloring hud to refine your choice…It’s not great, but it’s workable.

Where Lolas REALLY shine however is custom skin matching. If you’re decent with photoshop I believe that Lola skins are the easiest of all three types to get just right. That said, very few girls can do custom matching.

Lola’s don’t have a lot of “extras” like milk and cum spots, but they do come with GREAT nipple rings, nipple bars, and prim nipples. The stock clothing that comes with them, while limited, is quite nice, especially the bra and bikinis.

Bottomline

When all is said and done, would I recommend Lolas? Yes, so long as don’t need to switch tops quickly, you don’t plan on going out with incredibly large boobs and super precise positioning isn’t critical to you. If you can afford them, get them. They’re sports cars, not work horses…keep that in mind and you’ll love them.

They’re my boobs of choice. Think of it as a “love-hate” relationship.

About These Reviews

A few caveats here. No one is paying me to write this review. I’ll hurt some feelings, but that’s how it is. This is my opinion based on a lot of use of all three products, including designing for them. I base all of it on personal experience and on the reaction I get from both men and women.

In all the photos in this series, the implants are attached at the spine.  I doubt this matters much, but full disclosure…we’ll talk about attachment points in a later post…

All photos are shot in midday light with no retouching. All garments are from our store, Whimsy’s Closet (shameless plug).

Last and maybe most important: I use Laqroki skin and “Sweet Lights” face lighting.

A Fast Way To Add A Booby Top Tank Top Texture

Major hat tip to Jennifer Vultee, owner of the Bad Kitty store, who provided this information. I wrote about this same technique for applying a new skin.

This is a much faster, safer method to put on a new texture then the manual methods I described in Part One and Part Two of my original series on adding a new top, though I do believe it’s still very important to know how that works too, if only to understand the way clothing actually fits on your top.

So to begin, first you need a regular top and a texture for your boobies (duh!). To make it easy, I’ve provided a free psychedelic shirt you can wear by going to appearance, create a new shirt, and dragging this image into the texture box:

Here is the Booby Top texture that goes with it:

Next Steps

1. Upload your booby texture to SL.

2. Find the developer’s kit in the folder where you have your Universal Implants. The latest version is called Universal Implants Developer Kit v1.1. Rezz to ground, copy the contents to inventory.

3. Find the Clothing applier, it’s called SD Clothes Applier Universal Implants 1.1

4. Drag the Clothing applier out of your inventory and rezz it to the ground. It will prolly look like a little red glowing box.

5. Find the booby clothing texture in inventory and right click it…Click Copy Asset UUID

6. Now go clothes applier on the ground and EDIT it

7. Look for the skin_settings script in under the content tab.

8. Open the script and paste the UUID between the quotes on the line key texturekey=” ”

9. Save the script changes. Let it do its scripty work.

10. When that’s done go to the General Tab, and rename the applier to something you’ll find memorable.

11. Close edit and touch the red box script applier…the new texture applies!

This definitely works and it’s a great way to work.

Good luck! It’s cool, man…

The Golden Ratio: Perfection in Your Body Shape

Introduction

One of the coolest, and exasperating, things about SL is that you can create a body that suits your self-image. The combinations are endless. And often disastrous.

You know when a particular shape doesn’t work. Something in you says: that’s not right. But what is it that triggers the response? Almost certainly it is because you are seeing something that lacks proportionality. “It’s off” and when you see that our brains are “hard wired” to respond negatively.

This isn’t Cindy’s opinion. Study after study has shown that human beings are programmed to respond to out of kilter proportions with discomfort…and to respond positively when it’s all “right.”

But what is “right”? The ancient Greeks knew. So did the portrait artists and sculptors of the Renaissance. They discovered that the “ideal” proportions of the human body are almost entirely based on a deceptively simple “Golden Ratio” or “Golden Section”…also known as Phi. For you math lovers, the ratio is 1 to 1.618, references found here). Another way to think about this is to draw a line that is 1 meter long. Divide it in two with the short section being .38 meter and the long section being .62 meter.

Objects, including the human body, specifically the location and size of things like the distance between the head and base of the neck, torso length compared to body height, that have this ratio incorporated will look balanced and proportional. Why? Who knows? But there is little doubt, and lots of research to prove it, that when you see a building that uses this ratio in its design, or a sculpture, or a living person whose body and face conform to this ratio, it will look “right”, pleasing.

Sound a little odd? Ask a friend who went to art school. If you went to yourself, you already know about the Golden Ratio.

So how does this apply to SL? Well, how is a shape actually constructed here? With sliders that are all based on numbers, right? Unlike the real world, you can use them to make a “perfect” shape…but its not easy and even the top shape makers, who are very good, often miss the mark.

I’ll state right here, so there’s no misunderstandings, that I’ve create a tool and a technique that will produce “classic” proportions in an SL avi. I do, and have done, many many consultations and it does work. Yes, I charge a fee, but it’s far less then the cost of a typical decent booby girl outfit.

If that doesn’t put you off, I’ll explain the theory and how I’ve come to create my Golden Ratio system…

The Basics

This ratio, as applied to SL, determines the “ideal” relative relationship between overall height and such things as neck height and width, arm length, head size, waist and hip location, torso length,etc.

Here is a simple example in this famous sculpture. In it, a critical golden ratio was deployed by Michaelangelo: the proportion of length between the torso and lower body.

Notice how the distance from his navel to the top of his head is 38% and his lower body is 62%. But that’s only the beginning. This ratio comes into play all over that sculputure.

So ok, big deal. You don’t want to look like David. You want an “ideal” body in SL! WITH big boobies! How? Read on to find out….

But here’s a little hint: Take a good close look at your torso and your lower body. Most avis in SL don’t conform to even this very very simple torso to lower body ratio. That’s why so many have overlong legs…but let’s see how to fix that.

Techyish Stuff: The Details

As mentioned above, golden ratios, like the simple one in “David” can be found all over the “ideal” human body. We’ll start with a male image, showing many of them:

According to the author of this chart:
The white line is the body’s height. The blue line, a golden section of the white line, defines the distance from the head to the finger tips. The yellow line, a golden section of the blue line, defines the distance from the head to the navel and the elbows.
The green line, a golden section of the yellow line, defines the distance from the head to the pectorals and inside top of the arms, the width of the shoulders, the length of the forearm and the shin bone.

Now, for sure, what may be a “perfect” body isn’t necessarily what one might consider an “ideal” body today. And you almost certaintly don’t want to look like a man. However, the essential proportions that are seen in the male body above and those for women are the same. A too short torso is going to look bad in both a male and female AVI.

But what about the boobs, waist, hips, and butt. Surely they are different? Well yes the circumference of these body parts are indeed different. But their relative locations and “balance” between where these parts of the anatomy are is not significantly different.

One MAJOR difference between male and female, obviously, is waist to hip ratio. For women, a waist that is between 66 and 75% of hip size is considered “ideal”: divide 24 (waist) by 36 (hips) and you’ll see what I mean. Fashion models (and men for that matter) approach 80% waist to hip (skinny bitches..and that’s why they look like boys!). But other then that, the golden ratio continues to define commonly accepted notions of the “ideal”.

Here are three pictures of me. I’m only showing a 38% to 62 percent torso-lower body ratio here (believe me, you DON’T want to see how I started out!), but there is more to observe…

The one on the far left is with a modified shape I purchased in which I corrected my torso-lower body (I didn’t include the ORIGINAL shape I bought to spare the vendor embarassment). My waist to hips is about 74%, a more narrowed look emphasized by a minimal amount of body fat…so I’m a bit on the skinny side in that one.

The second is me with a 67% waist-to-hip ratio with the rest of my body set up using the “Golden Ratio.” The one on the far right is me with a 70% waist to hip, still set up for Golden Ratio proportions (click picture for a larger view):

At first they all look pretty similar, don’t they? But look closer at the center and far right. Arms, hips, shoulders. The far right is a bit too strong for my personal tastes, so I use the center shape. I made those corrections using Golden Ratios, based on a the special tool I created.

You might ask this question upon seeing these…Why do I look skinnier overall (not just in the hips) in the image with a 74% WHR (left) compared to the one with the 70% WHR (right)?

The reason is the SL slider system wihich does NOT permit direct manipulation of the waist size. It can be changed, but a lot of factors, including overall height and body fat affect it…I wanted to stay the same height so I added some body fat to get to 70%. This is one example of why relying on SL sliders alone may not give the best results…you need much more than that.

So What???

So what does all this mean in SL, and most particularly for the big booby girl community?

A number of things actually:

A. Your boob position, unlike in “regular” avis is moveable. And lots of girls get into trouble with that. There is a very specific place on the chest where they will look their best based on your height, neck length and navel location. Where the nipples fall makes a huge difference in overall appearance.

B. What about boob SIZE? Well that’s up to you. But keep in mind that extremely big boobs (say over 2100 cc) will end up lower on the body. Compensating by angling upward, which many try to do, won’t really help because they’ll look unnatural. If you want a superbig look, that’s your call. I’m just saying that if an “ideal” shape is your goal that will be hard to do if you go bigger than 2100 cc for everyday life.

C. How about a big butt? Well, some do this to compensate for overlarge boobs or they just like that. Which is fine. But increasing butt size does significantly impact your hip to waist ratio.

A Tool For Achieving the “Ideal”

There is no question, that having the best, most natural body possible for your height and personal tastes is possible with the SL appearance sliders. But it’s very difficult to truly get it right…and involves a lot of guesswork. You can buy a “fixed” shape and most are quite good, but I’ve also discovered that most also have problems in quite specific areas.

And anyone who has messed with the SL sliders at all knows that a “small” tweak in one place has implications every where. Widen the hips incorrectly and suddenly you’ve got no thighs. Add a bit of body fat (or more often, cut it) and your arms look weird. It’s guesswork at best. Not to mention frustrating.

One Solution: My Golden Ratio invention. Used properly it will visually show you your ideal Golden Ratio proportions based on your height. Whether or not you choose to use those proportions is up to you. I can say that I’ve done a great deal of Beta testing and without exception, small tweaks or large, the women who I’ve worked with come out of a consultation saying they look much more natural. Because they DID look more natural! And you don’t have to be skinny either. These proportions work whether you like the Twiggy look (to a point!) or a voluptuous babe who stepped out of a Reubens painting.

Several of my beta testers have asked about buying this tool. Unfortunately, I can’t do that because it can too easily be copied and stolen. As I mentioned at the top, I am however, doing consultations and they are extremely reasonable.

What is Involved?

Both Booby girls and “regular girls” have been thru my testing and consultations. The only thing you need is a modifiable shape. You will NEVER lose that original shape version. I make certain of that. We talk and we decide what you’re look is. It’s probably very close to what you have right now.

We begin by getting your exact height. From there we look at the “correct” proportions for your stature like, for example, your leg length versus your torso length, your neck size, and your arms. Your head size compared to your body size, and on and on and on. We go carefully and deliberately and after each adjustment you decide whether you want to go further.

Here’s what I don’t do: I don’t mess with facial features. Nor do I mess around with boob size, though we can discuss location if you’re a big booby girl.

Here is a photo of a client. “Before” is on the left.

Again, at first glance, not much is changed. But look closer. This girl had a very nice shape to begin with. But notice the arms and the hips. Her legs have a tiny bit more “heft” too.

I don’t have permission to show images of clients who came to me with very substantial problems. They weren’t newbies. Legs were too long, or neck too short, shoulders too strong (or weak). Many issues. All correctable!

If you’re interested, or just curious. Drop me a line. You can reach me at Cindy Melgund in-world.

Favorite Hair Businesses of the Girls on Implant Nation Group Chat

Fun question answered: what is your fave place to get hair?
Karasi Finesmith: Deviant Kittys
Minka Pearl: damselfly
dani Sheryffe: gurl6
Minka Pearl: and!!! tukinowaguma
Jennifur Vultee: Lillipopz, Damselfly, Ivanka Akina, Tukinowaguma
Jennifur Vultee: almost forgot Bischwear and Gritty Kitty
Minka Pearl: calico and Shop SeU kurukuru hair
Minka Pearl: OH and EXXESS designs but you cant go there, all MINE! haa.

My personal faves are: Cake, Calico, Damselfy, Truth…I also have a secret one I’m not tellin’ about!

Booby Basics: Creating, uploading and adding a new top to your outfit (part 2)

In the first post in this series I described the basic structure of your boobies with an emphasis on getting you to the tanktop layer. I did this because I assume that most readers would be interested in how to make their OWN tops and then apply them.

I want to be extremely clear about several things before going further.

First, these instructions are meant for folks with intermediate skills in graphics editing programs and object editing in second life. These are NOT for total beginners and I’m in no position to teach these skills.

Second, the whole issue of copyright is for another discussion, but suffice it to say you have “fair use” of anything YOU make from scratch.

You do NOT have fair use to take someone else’s design, copying it and SELLING it. It’s a little vaguer when it comes to giving stuff away, but I would advise NOT doing that either. Keep your creation for yourself and stay out of that whole mess.

I want it SUPER CLEAR that I make NOTHING out of anything I don’t own or make and I DO NOT ever sell anything. Here is a a pretty good article on on Copyright and the DMCA.

And finally: to the professional clothing makers out there. I KNOW there are many, many ways to make tops. This is my way. I will be very pleased to publish your tips because I do not claim, in anyway, to know all the possible options. I use this technique because it works for me. Share yours.

If you read first post in this series you are now able to identify the TANKTOP layer of your boobies.

The first step, before you do this, is to have a “standard” top of some kind that you’ll wear under the boobies. I made this one for the purposes of this tutorial:

The top you’ll make for this is fairly simple because there is, basically, only a hole for your neck and because the texture uses a HORIZONTAL pattern. Vertical patterns can be very tricky. And I’ll show you why now.

Your boobies are rounded, sculpted prims. They curve dramatically and that has a huge impact on what they do to a clothing texture.

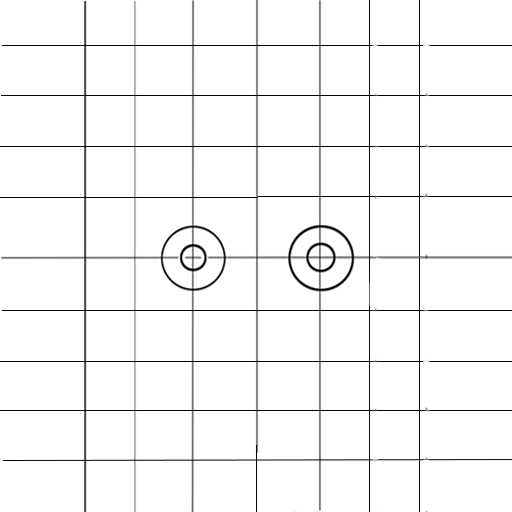
To demonstrate, I’ve made an alignment grid. You may use this freely. Here is how it looks in a photo editor:

The two small circles are where my nipples center up. The larger circles are my “safe area” where I know the nipples won’t show in an outfit.

Now here is how this grid looks when uploaded to SL and added to the TankTop Layer:

You can see how pronounced the stretching really is.

Now, to demonstrate further, I’m going to skip ahead and bring in the top I made. Again, I will show you how in detail this was done, but I want you to see what the effect of all that stretching really is.

Here is the tank top file, with alignments showing, as it appears as an image:

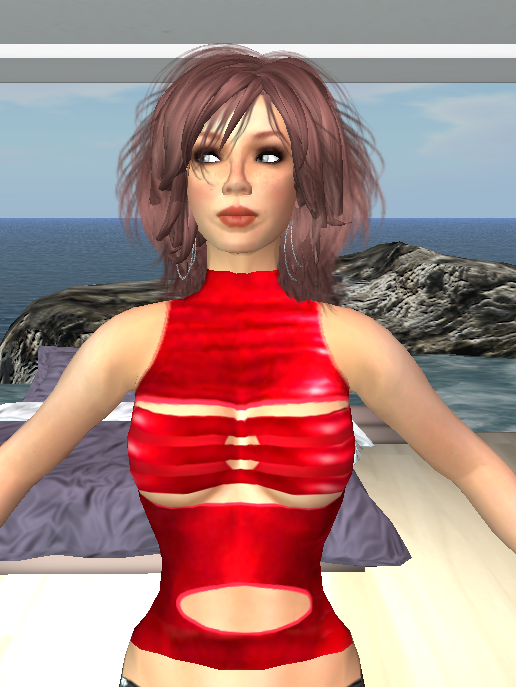
And now here it is as a top:

Look at the way the lines bend from the side…and notice, most particularly, how few of the grid lines actually SHOW when the texture is put on the boobies.

Pretty interesting how the lines bend, isn’t it? Where these lines show up has a major impact on your clothing textures. I use them all the time before uploading a final image. When we get to actually making a top, you’ll see very clearly how valuable having grid alignment is.

For now, here is the final version

You may use both the shirt texture and the top texture freely. They are below. You may also copy and distribute them to friends. Please do NOT sell them. These are for us.

Booby Top to match:

Next Time: Creating a top from scratch

Booby Basics: Creating, uploading and adding a new top to your outfit (part 1)

This post is the first in a series that is intended to get you to the point where you can create and add your own tops to your boobies. Read PART TWO for more information on creating a new top.

This tutorial about the Implant Nation boobs so I will apologize in advance that this tutorial doesn’t discuss other brands.

It has two goals:

1. To show you the basic structure of your boobies, with emphasis on the layer that contains your tank top.
2. To show you how to isolate the tank top layer.

Most of us who have bought good quality products from our marvelous vendors apply our tops with an application that the vendors include in the purchase. This is a great value-add and not to be minimized.

BUT you can also add your own top to your boobies manually. And if you want to create your own, you’ll need to know how. This is about manually adding your top.

Before we go any further, let’s look at the basic knockers:

Now, as you have no doubt discovered, the boobies are an attachment. They are composed of a number of parts. Let’s Edit them …(If you click the pic you’ll see this in a much larger image…)

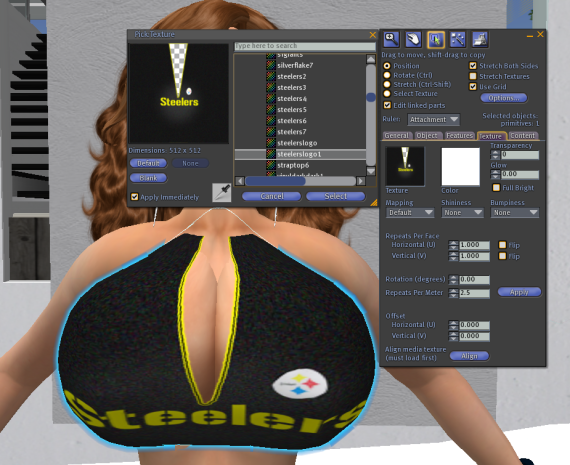
Notice that in the texture box, it says “multiple”…that’s because there are a number of textures associated with the boobies, including the most important: the tank top layer, bra layer and skin layers…

Today, we’ll only look at the top tanktop layer, because that is the one that you’ll mostly work with if you want to add your own texture or color them (you can always color a tank in the IN HUD, but I like the SL tools better…your choice)

Now, before we even TOUCH the boobies, make sure you are working with a copy you can afford to trash. We’re gonna move stuff around.
To make this easy to see, go to your HUD and put on a tanktop.
Next select the boobies and do the Edit thing in the pie menu.
Now, check the box that says Edit Linked Parts and click on the the boobies so that you have only the top layer, the tank top layer, highlighted:

You can verify that you have the correct layer selected by hitting the General Tab in the editing box…It should say you are working on the UIProtoNoNipples.

Now, for this tutorial I selected a texture I had made for the boobies and placed it in the layer.

I know that some of you are saying: I want to make my own tops and do this too! Well you can. Bart has thoughtfully provided all the templates for the tops here:

http://implantnation.biz/downloads/

You’ll find them in the Basicclothing.zip file

They are a little difficult to work with as is, so I’ve made a set of them for you all that may be a little easier to work with in Photoshop or your graphics editing program: Cindy’s Mods of Bart’s Basic Clothing Templates Hopefully this file, which is about 5 Mb will download for ya!

Sadly, you do need to have a grapics editor to make tops, just as you do for nice clothing elsewhere in SL. But if you are familiar with graphics programs you’ll have a great time!

Next time: Steps in the Creation Process for an Original Booby top.