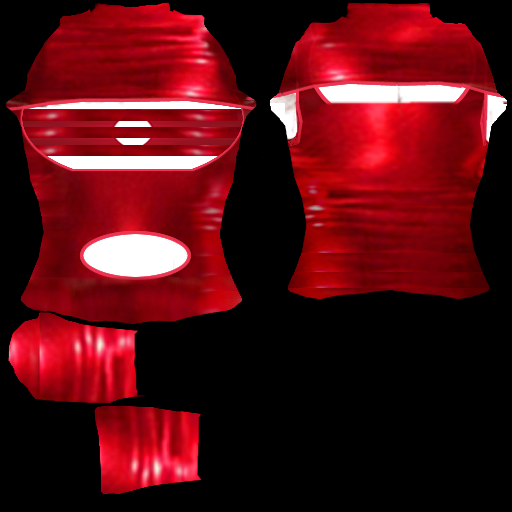
In the first post in this series I described the basic structure of your boobies with an emphasis on getting you to the tanktop layer. I did this because I assume that most readers would be interested in how to make their OWN tops and then apply them.
I want to be extremely clear about several things before going further.
First, these instructions are meant for folks with intermediate skills in graphics editing programs and object editing in second life. These are NOT for total beginners and I’m in no position to teach these skills.
Second, the whole issue of copyright is for another discussion, but suffice it to say you have “fair use” of anything YOU make from scratch.
You do NOT have fair use to take someone else’s design, copying it and SELLING it. It’s a little vaguer when it comes to giving stuff away, but I would advise NOT doing that either. Keep your creation for yourself and stay out of that whole mess.
I want it SUPER CLEAR that I make NOTHING out of anything I don’t own or make and I DO NOT ever sell anything. Here is a a pretty good article on on Copyright and the DMCA.
And finally: to the professional clothing makers out there. I KNOW there are many, many ways to make tops. This is my way. I will be very pleased to publish your tips because I do not claim, in anyway, to know all the possible options. I use this technique because it works for me. Share yours.
If you read first post in this series you are now able to identify the TANKTOP layer of your boobies.
The first step, before you do this, is to have a “standard” top of some kind that you’ll wear under the boobies. I made this one for the purposes of this tutorial:
The top you’ll make for this is fairly simple because there is, basically, only a hole for your neck and because the texture uses a HORIZONTAL pattern. Vertical patterns can be very tricky. And I’ll show you why now.
Your boobies are rounded, sculpted prims. They curve dramatically and that has a huge impact on what they do to a clothing texture.
To demonstrate, I’ve made an alignment grid. You may use this freely. Here is how it looks in a photo editor:
The two small circles are where my nipples center up. The larger circles are my “safe area” where I know the nipples won’t show in an outfit.
Now here is how this grid looks when uploaded to SL and added to the TankTop Layer:
You can see how pronounced the stretching really is.
Now, to demonstrate further, I’m going to skip ahead and bring in the top I made. Again, I will show you how in detail this was done, but I want you to see what the effect of all that stretching really is.
Here is the tank top file, with alignments showing, as it appears as an image:
And now here it is as a top:
Look at the way the lines bend from the side…and notice, most particularly, how few of the grid lines actually SHOW when the texture is put on the boobies.
Pretty interesting how the lines bend, isn’t it? Where these lines show up has a major impact on your clothing textures. I use them all the time before uploading a final image. When we get to actually making a top, you’ll see very clearly how valuable having grid alignment is.
For now, here is the final version
You may use both the shirt texture and the top texture freely. They are below. You may also copy and distribute them to friends. Please do NOT sell them. These are for us.
Next Time: Creating a top from scratch


Posted by Malaise Maladay on December 21, 2009 at 7:47 pm
Thanks for this! I get more into the LSL side of things so it’s helpful to see how other people do this kind of thing.
Posted by Booby Basics: Creating, uploading and adding a new top to your outfit (part 1) « Big Booby Girls in Second Life on February 8, 2010 at 11:52 pm
[…] is intended to get you to the point where you can create and add your own tops to your boobies. Read PART TWO for more information on creating a new […]
Posted by A Fast Way To Add A Booby Top Tank Top Texture « Big Booby Girls in Second Life on March 8, 2010 at 12:20 am
[…] faster, safer method to put on a new texture then the manual methods I described in Part One and Part Two of my original series on adding a new top, though I do believe it’s still very important to […]